Best selling wood projects
A project I have just completed was to make some small occasional tables, a set of 5, using jarrah removed from a roof during a current renovation. This beautiful house, built around 1930, has the most wonderful Art-Deco ceilings - which tragically were very seriously damaged during the recent storms in Perth... but thats another story. A second storey is being added to the house, and the old roof timbers were thoughtfully saved to be re-cycled. My client is a lover of all things Art-Deco, so my mission was to design and make 5 tables using this timber.
After some research, I submitted the following design and concept drawings which were agreed to by my client:
 About the timber.
The timbers saved during the renovation are the classic stuff of jarrah western australian roofing which was pretty standard for over 100 years until the re-structure of the WA native hardwood timber industry which commenced in March 2001. Since that time jarrah stick roofing has been replaced by pine and steel. The old roofs and houses are now a wonderful source of dry jarrah, as well as karri, wandoo, marri and blackbutt. Tragically too much of this timber goes off into land fill as old houses are knocked down in the path of "urban infill" or the spread of McMansions. How did I get myself onto this soapbox again??

This stack of timber pictured here on sawstools on my front lawn was the pile of timber saved from the renovation by my client. It is predominantly 4"x2" timber (rafters) but also includes a few 5"x2" and 4"x3" sticks. There is also a number of 6"x1" and 8"x1" boards (ridge pieces) which are of particular use for the tops of the tables and the legs/ends.
All of this timber in the stack shown was denailed first. A dirty and slow process, but a good opportunity to examine each stick and get a sense of what was available for the project. There is much more timber here than we need - but I am a great recycler of this wonderful stuff!

This picture shows the 6"x1" and 8x1" sticks from that pile, which I have here denailed, scrubbed down with a wire brush, and scanned with a metal detector to ensure there are no nails remaining. Nails are not kind to machinery and cutting tools!
Shown here parked out side my workshop on another pair of sawstools, they are waiting to be cut up ready for dressing.
None of the boards are flat, so one face must be flattened first. These roofs were all built with green (unseasoned)timber, so the timber has dried (seasoned) in the roof. These timbers spent 80 years in the roof, so they are very dry. I find that the heat and dryness of old roofing timbers creates jarrah which is almost "case hardened" sometimes, but the timbers from this roof do not appear to be over-cooked.
Theres some nice stuff in there, though some damage was acquired from the demolition process. Thats not unusual.
Preparing the timber.

Much of the 6"x1" and 8"x1" sticks were cut into shorter lengths ready for making the table tops and the legs/ends. This was done before any dressing of the timber, due to the fact that the timber needed to be flattened. The aim was to try and obtain stock 22mm thick (7/8") which is a wonderful dimension commonly used in the past but no longer commonly available. Hence the need to ensure we lost as little thickness as possible from the timber. The pic here shows the timber after it has been docked into the two different lengths needed.
The flat faces were obtained using two methods.

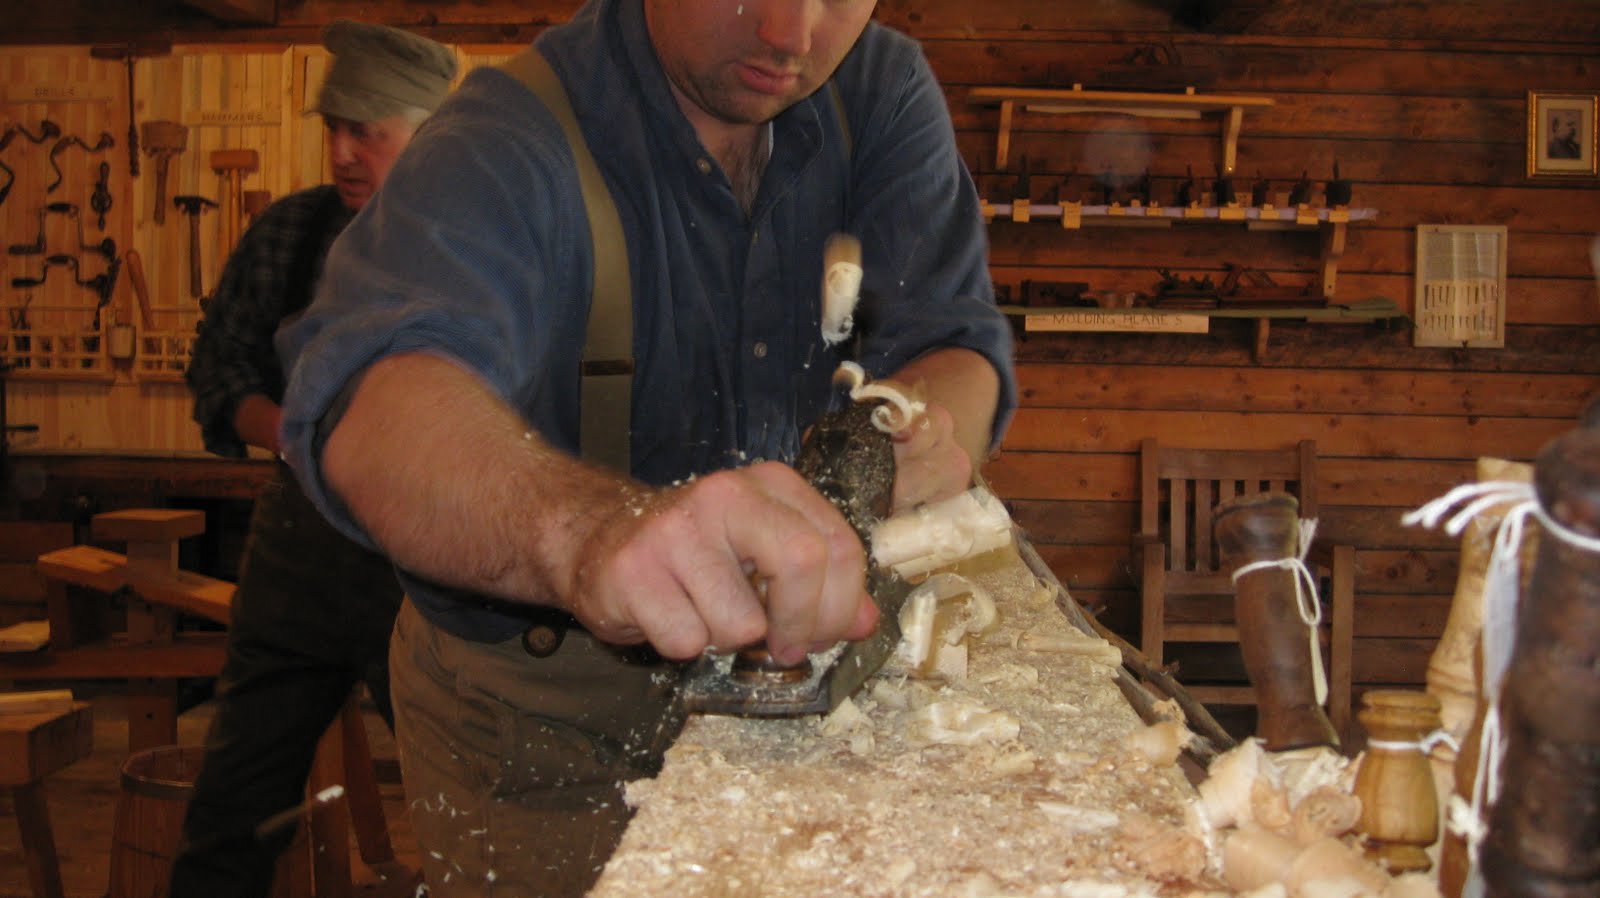
My buzzer only has a 6 inch cutter, so I was able to create the flat face on the 6"x1"s over the buzzer easily enough. The wider boards I had to flatten by hand in the old fashioned method, using my trusty No5 1/2 jack plane and a pair of winding sticks. The pic here shows the plane on a piece I was working on at the time.
Once the flat face is created, the pieces are put through the thicknesser to make the opposite face parallel. The boards are flipped over several times as the thickness is reduced, thus creating two flat dressed wide faces.

Theres a picture which shows the same stack of timber
after it has been dressed to 22mm thick. There is some very nice timber in this pile.
The plan was to leave the nail holes in the wood, as this tells the story of the timbers former life in the house.
Making the Tops.
The process for making the tops starts with matching up the machined pieces for colour and grain, and shooting their edges on the buzzer, to create the tops. Some of the boards had splits, so these were sawn down the split lines and the new edges shot.
Therefore some tops were made out of two pieces, and others were made of up to 4 pieces. The picture here shows a couple of the tops set out and prepared ready for preparation of the edges and then gluing up. The visible ones here are both 2-board tops.
The plan is the rip a piece off each side to use to create the under side build-up, and to dock a piece of each end to create the under end build-up.
One of the most effective ways to create good edge joints is to create a "lightning joint" profile. This works like a tongue and groove, and has the advantage of doubling the surface area of glue.
This creates a superior joint. I used a router cutter to cut the profiles on the edges, but back in the Art Deco era, these were cut with spindle moulding machines in the bigger workshops. So the use of this jointing method remains consistent with the period as a technique. It is far superior to a butt joint, and I like it!
There is a photo here which shows the joints cramped up.
Once the edge profiles were prepared, the tops were glued up. There is a pic here showing a pair of tops glued up simultaneously, to save on cramps.
After the glue dried overnight, the tops were put back through the thicknesser to clean them up. The finished thickness was 20mm, giving a doubled up edge of 40mm. That was the plan.
There is a pic here showing the stack of tops after they have been cleaned up through the thicknesser. Now it is time to make the rips off the side and dock the ends. Where we were unable to get the

side rips wide enough, some of the leftover timber was used, matching the grain and colour as best possible. We needed 30mm wide side rips, and 42mm end rips. The end rips were docked to length in such a way that the lightning joints lined up, top and bottom, making sure that the correct ends were always matched to the correct part and orientation of the top.
There is a pic here showing one of the tops covered in cramps as these underside pieces are all glued to the tops. they will be left overnight to dry before the tops are cleaned up again and the final machining is done to create the final dimensions for the tops - 400 x 240 x 40mm.

Although we only needed 5 tops, I did a 6th one to ensure I had a spare. There are some unknowns with the nail hole positions, though I had been very careful to try and place them off the edges.
Making the Leg Ends. These were going to be more challenging than the tops, as each one has an inlaid design on the outside face, plus tenons cut on the bottom ends.

First the selected boards were docked to length, and then the taper cut on each side. This was achieved by the use of a purpose made jig on the table saw, as pictured. (The overhead saw blade guard was moved out of the way for the photo). Use of a jig like this enables consistent repetition, so that each component would be exactly identical.
Once these were cut, another jig was used with a router trimmer with a 6mm cutter, to create the grooves to house the WA Blackbutt inlay. While these jigs are time-consuming to create, they end up both saving time and ensuring consistency and accuracy. A fair bit if planning goes into it...
There is a pic here which shows the stack of leg ends part way through the routing process.


The blackbutt strips were machined up, such that they would be a snug fit in the grooves. The corners were all cleaned to make the crisp corners of the grooves, using a sharp chisel.
The tricky part now was to cut the pieces to length accurately. This was done by hand, using a small gents saw with 24teeth to the inch - very fine indeed. Another jig was made to ensure the cuts were always made at the required 7.5 degree angle on each end. Once all of the components were cut to length, the pieces were glued into place and left overnight to dry. The pics here

tell the story.
The following day, when the surplus glue and veneer was sanded off, The resulting panel was very pleasing indeed! This pic here shows the cleaned panel. Looks like a winner!
Making the Base.The bases are made from 4"x2" rafter material.
The rafter material was docked over length and then dressed.
Once dressed, the pieces were matched up and arranged, 3 pieces selected for each base.


These were glued up, using a double tongue technique in each joint. Once dry, the bases were put back through the thicknesser and then docked and ripped to their final dimensions. Then the edge profiles were cut on the ends and the sides, as shown in the pic with the stack of bases. The mortises were chopped in the bases, all at the required 7.5 degree angle.
Where did this 7.5 degree angle come from? The best method is to transfer the ideas from the concept drawing to a full sized drawing, on a "set-out board". The angles and dimensions of components can be measured from the full scale drawing on the set-out board. The picture here shows the set-out board, which is a piece of plywood. Being a great recycler, I obtained this piece of ply from an industrial airconditioning crate - good quality ply, too!
Anyway, the waste was removed from the mortises first, using a forstner bit in the drill press at the correct angle. Chisels were used to clean out the holes. The leg/ends would have tenons cut on the bottom ends, two stub tenons with a haunch inbetween, to be inserted snugly into the base mortises.

These pics show the dry fitting of one of the joints in action. The final clean-up and finish sanding of the components will only take place after the joints have been fitted correctly.

The trusty Stanley No.140 block plane shown in the pic was made specifically for the trimming of tenons. A little beauty of a tool, long since out of manufacture.

After the finish sanding of the components, the leg/ends joints were glued up. This pic shows the glued up base. The top here is not yet attached, only sitting on top. The next stage was to attach the tops to the leg/ends and make and attach the feet.
The project comes to completion.
The tables were assembled and the polishing process has commenced. This would take several days before they would be ready for the final waxing. The finish used was Cabots Danish Oil, which is a kind of oil/varnish mix. It has the wonderful look of a hand rubbed oil finish with the added benefit of a high solids build, providing an excellent platform for the wax finish. The oil and wax finishes gets better with age, unlike those nasty spray-on polyurethanes which I refuse to use these days.
The completed tables are pictured here during the polishing phase.
I was very pleased with the way they have come together, and am sure they will fit beautifully into the art deco surroundings of my clientss home.
For me the aim to achieve a high level of authenticity in their construction, such that a casual observer would not be aware that they were not made in the 1920s or 30s. The construction techniques are true to the era as are the fixings - no philips head screws, only slotted head wood screws and small bullet head nails were used.
This pic shows one of the tables after the polishing was completed.
I am very pleased to have contributed to sustainable timber usage by recycling and giving new life to beautiful timber which had previously spent 80 years supporting a roof. A credit to my client, for not wanting to see the old roofing timbers thrown in the skip bin bound for landfill. After these tables have been passed down the line many times as family heirlooms, there is no reason why this same timber cant again be used and re-used for centuries to come.
I love this stuff... It is such a priveledge to be making family heirlooms.
Best selling wood projects