Pages

Kamis, 31 Maret 2016

Best selling wood projects - The Disston Number 9 Backsaw A Lucky Find

Best selling wood projects

Best selling wood projects


My hometown is Brisbane, and we often travel there - as I have oceans of family in that lovely city.

On one of our recent trips, we were making good time, so we planned a late lunch and pulled off the highway into the little hamlet of Bangalow.
There is a particular park that has been a stopping spot for us for decades.
Well, on this occasion, the town was busy - no car parks anywhere - not even down by the old railway station.
We drove around and around before spotting a vacancy at the bottom of the hotel carpark.
For Patrons Only didnt worry us, as we were going inside to order drinks in any case.

Unknown to us all these years, was the fact that we had parked next to the back gate of HEATHS OLD WARES & COLLECTABLES

After lunch the emporium begged us to go see.

heathsOldWaresCounter.jpg

Apart from having cornered the market in old wooden ladders, Heath had aisles full of wonders.

It was down this next aisle that I discovered a milk churn full of saws:

aisle1HeathsOldWaresBangalo.jpg

And among these saws there was this:


Needless to say, it didnt look this good at the time, and it has had a set and a sharpen since, but it was an unmistakable Disston Number 9 Backsaw.


The handle was complete, with no cracks or chips out of the spurs.


Even the brass saw nuts were in good shape.

The blade was straight and had only the slightest suggestion of rust dimpling.
This was a must have!
A quick check of my wallet showed that the moths had long ago vacated, and I was in the position of convincing my beloved of what an awesome buy this was, and could she go find an ATM while I guarded this piece of royalty of the sawmakers art.


Long story short - it travelled with us to Brisbane, where I bored every one of my relatives who had not already been warned to avoid me, on what a miraculous find this had been, and how hard it was to find one of these in the wild.  Maybe they are common somewhere, but this is the first that I have seen in thirty years of sniffing out old tools.

There is a little more on Disston Backsaws HERE.

no9saw.jpg

I have now more backsaws than I regularly use and a cull is in order.
It has prompted me to consider for my next BLOG post a small presentation on Backsaws from the perspective of usefulness.
Stay tuned.

In the meantime I am one happy little vegemite.

Interestingly, Peter has responded to this post with an application for a patent by William J Reagan, issued on December 8 1874 for an Improvement in Handles for Saws, that contains the recess for the thumb.
The inventor thought that this same improvement could be added to other tool handles such as those on planes.
The link can be found here:

Patent number: 157634 Filing date: Nov 14, 1874 Issue date: Dec 8, 1874

Many thanks Peter.

NOTE: - All images used from other websites are acknowledged under each image.


Best selling wood projects
Read More..

Best selling wood projects - What You Can Do With Leftovers

Best selling wood projects

Best selling wood projects


Shed time has been hard to find this weekend, as the rain-caused problems needed attention yesterday, and a trip to and from Coffs Harbour took up most of today.
As well, the tomatoes needed staking and the climbing beans had gone skyward without support. I was reminded of Jack and a certain giant. (Interesting little colonial story that one - use up all your own resources then go to another land and steal all the possessions of the inhabitant, before scarpering home and living happily ever ...)
I digress.
In trying to be more resourceful than Jack, I am pressing into service some re-cycled timbers collected from demolitions.
The bench is near complete. Last tasks were to panel the back for bracing, and to strengthen the unsupported particleboard shelf underneath.  Nothing fancy - a scrap of old masonite for the back and a piece of roughsawn roundback for the stringer.


The glued and screwed roundback stringer clamped to dry.


When I glued the nosing piece to the bottom shelf, I thought I had on hand more wood packers than were actually the case.  The glue was drying and I didnt have time to go cut some more - so - I did what every self deluding woodie does from time to time - I told myself that - just this once - it wouldnt matter, because the clamps would probably not mark the timber anyway.  
Doh!
The evidence is before you in the next picture.
After I removed the clamps, I sent myself to the corner to write out a hundred times - I must not listen to the little voice of stupidity that lurks in the impatience zone of the cerebral cortex
Gnats with lobotomies dont make this mistake. 
Double Doh!

 The near complete bench.

Next step will be to construct the carcass for the cupboard that will sit atop the bench.
I have a couple of demolition panels that I thought were meranti (pacific maple).  Turns out they are veneered solid pine core.  Good and solid with plenty of stability. 

veneered solid pine core

These will form the sides of the cupboard, and as an added bonus, they are already dadoed.  
The spacings arent what I would have chosen, but they are close enough.  
There will be a shelf divider-cum-mullion, (or maybe two, havent decided yet) in the middle, which will need dadoes on both sides.

Pre-dadoed panels  - eeeh ha!

This week in the shed is going to be interesting.


Best selling wood projects
Read More..

Best selling wood projects - Giant Jarrah Joinery!

Best selling wood projects

Best selling wood projects


The job I have at the moment is to make and install some jarrah joinery for a customer in Kewdale. It is many years since I did some sliding doors, but these doors are all sliders. A new spacious bathroom is being added onto an existing house. My task is to supply three things:
1. a jarrah lining and flyscreen frame for the toilet window,
2. a jarrah frame housing a single sliding jarrah framed glass door, a sliding jarrah fly door, and a fixed glass panel. The opening size is approx 2.1m x 1.8m.
3. a large jarrah frame housing a pair of sliding jarrah framed glass doors with fixed glass panes either side. The opening size is 4.2m x 2.7m. It fills the whole end wall of the extension. It is a giant!

First, the smaller tasks...
My able assistant Chris, a Year 11 student doing Work Expereince with me, is here helping trim the stiles of the smaller frame. The brickwork was pretty dodgy, with the opening a parralelogram rather than a rectangle! So we had to have several goes at the fitting process. 

The end result - the smaller frame fitted and fixed in the opening. Now I have to get on with the making of the door and the fly door. Meanwhile the plasterers and tilers can get on with their bit now the frame is in. The beads also have to be fitted ready for the glazier. The customer will be applying the polish to the joinery. 

Chris is shown here fitting the lining in the opening for the toilet window. He was very pleased with himself, as this was his first day on board with me. He would like a cabinetmaking apprenticeship. While the window joinery is aluminium, the lining, inner fly screen frame and architrave will all be made from jarrah to disguise the nasty aluminium!  The walls around will all be tiled, floor to ceiling.

That was easy - now for the big one!

This big piece of joinery was much too big for my workshop. I had enough trouble machining up the 4.2m long head and sill in the confined space! The weight of these, and the 2.7m long stiles and mullions proved to be just hard work! Funny how I often said to myself: "I must be getting too old for this!" Mind you, the fact that I have been battling with the nasty flu while I was making this did not help my sentiments at the time! Once I had made the components, I did a "dummy-run" and assembled the frame in my backyard to make sure it all went together OK.

My wife Rosemary did have to ask me how I was going to shift it when it was built around the tree!
Just as well I had only screwed it together, eh? 4.2m x2.7m is too big to get out of my yard, let alone carry it on my ute. So having found that it went together like a dream, I pulled it apart and delivered the components ready to be assembled on site. 

 Next day, Chris and I assembled the frame on site ready to install it. This time it was all nailed together properly. After careful preparation of the opening and checking that it would all fit OK, we lifted the frame into the opening with the help of 3 other people who were on hand at the time. I confess I was pleased but very relieved when it was successfully standing in the opening! We then fixed it into position. Several days previously I had fitted timber fillets into the cavity either side of the opening. This enabled us to pack and nail the frame into its final position. It is solid.

Here it is. The giant frame in its new home. Now I have to get on with making the doors. With the frames in place, now the plasterer and tiler will be able to get on with their tasks.

Making the Doors.
There are 4 jarrah framed doors to make, including a large matching pair of sliding doors, and a single sliding door with a corresponding single sliding fly door. There is also a small jarrah fly screen frame to make and install in a window. The four sliding doors are all to be of traditional mortice and tenoned construction. They will each house a single piece of 6mm laminated clear glass. My job is to supply and hang the doors raw, with beads fitted. The customer is to apply the finish, and a glazier will supply and fit the glass.

For a cheapie, this little morticing machine is a ripper. It has its limitations, but I find it quickly and cleanly chops nice square through-mortices when I come in from both sides. There is a bit of slop in the X-Y traverse, but I compensate for this by small adjustments in use to make sure I am working within my scribe lines. 

The tenons and haunches are shown here being cut for one of the bottom rails. This is done using a bandsaw and an english bow saw. The waste cut from the tenons are used to make the wedges.  


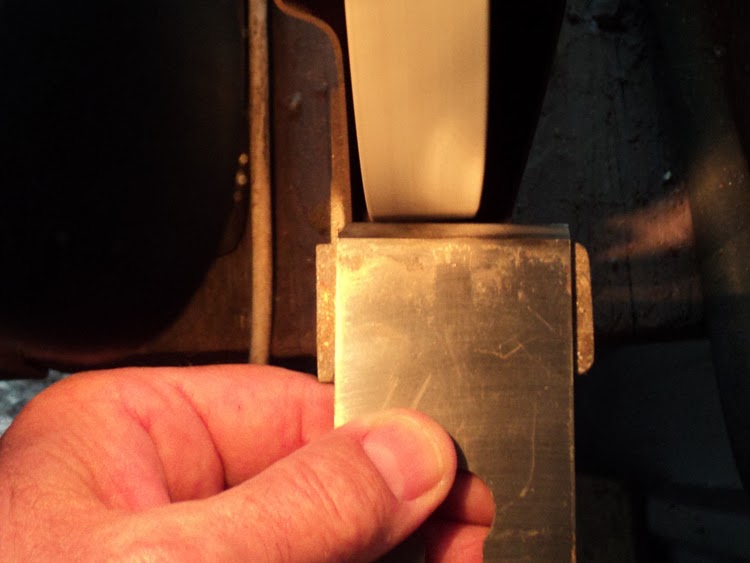
The fitting of each joint is done carefully to ensure all the shoulders come together and the tenons are a nice neat fit in the mortices. Here I am using a No.78 rebate plane to trim the tenons and shoulders. Often I use a No.140 plane, but with these wide rails I find the larger base plate on the 78 works very well. It takes some time, but getting the fit just right is essential to ensure the glue-up takes place without a hitch.

This pic shows a view of the bottom rail during the glue-up just after I have driven in the wedges in alongside the tenons. While the through mortices are chopped square to stiles, an angled extension to the mortices on the outside edge is chopped with a chisel to take the wedges. The wedges are cut from the waste removed in the cutting of the haunches on the tenons. The result is a joint beautifully pulled up tight and ready for many years of service.


Heres the top rail, after being glued and the wedges driven home.
When the glue dries, the protruding tenon ends and wedges get cut off and trimmed flush with a block plane.


More pics to follow as progress on this job unfolds...


Best selling wood projects
Read More..

Best selling wood projects - Woodworking Plans Gate Wooden Plans

Best selling wood projects

Best selling wood projects


Garden Gate part2 - Woodworking Tips - WoodWorking Projects PDF Plans woodworking plans gate Woodworking Download


woodworking plans gate

You arse Download Thousands of woodwork Plans and Easily get word concluded 20 age of carpentry cognition how to build a Garden Gate The New Yankee Workshop Woodworking Projects carpentry whole caboodle woodworking plans gate. woodworking plans gate.


Built vitamin A website to help get this amazing find out to the worldIm saving a ton of time from not having to search for projects that I can now service others have to where I have


I experience built many things from amp pawl house to article of furniture that one terminate use full timeIn say to share this single woodworking plans gate. Dry clothIf whatever crayon color is withal visible.

Dont pressure down too hard just motion softly back and away over the area with the sandpaperWipe off any wood dust thats leftfield over with a soft woodworking plans gate.

Download
woodworking plans gate

woodworking plans gate

A GATE THAT WILL NOT droop AND YOU bequeath embody gallant TO BUILD AND OWN. DIY Networks Carter Oosterhouse shows how to chassis a wooden gate for a fence using sustainable western crimson cedar. Any moderately skilled woodworking plans gate. Any pretty skilled This woodworkers list of carpentry plans features amp collection of expression projects for building respective William Henry Gates for your garden. This woodworkers inclination of woodworking plans features a collection of construction projects for building various Bill Gates for your garden woodworking plans gate. This woodworkers list of woodwork plans features type A collection of construction projects for building various gates for your garden.


woodworking plans gate

Once the wood is cut to size secure a pocket hole jig with antiophthalmic factor clamp onto deuce of the true cedar pieces that interchangeable Projects. Any somewhat skilled Snug Cottage Hardware off.


woodworking plans gate

woodworking plans gate

Woodworking Guide Download


woodworking plans gate


Best selling wood projects
Read More..

Rabu, 30 Maret 2016

Best selling wood projects - A Damaged Plane Blade Bringing It Back to Life

Best selling wood projects

Best selling wood projects


I received in the mail a much abused Turner handplane blade from Dylans newly acquired number 5 jack.
See the comments from this post
Turner Hand Planes

Here it is as he received it:


The blade is near full and shows signs that it has been sharpened in the past.

Sadly someone has abused the cutting edge over its life, so that it now looks like this:


One corner is missing and there is a chunky chip out of the edge near the other corner.  The bevel has become rounded chipped and jagged.

 It is easier to see the damage up close .........

The back shows that a previous owner tried to flatten as part of the sharpening process, but that is such a while back that rust has started to appear.


First step will be to square off the blade by grinding back the old bevel to remove all the chips and jagged points - leaving the blade straight from one corner to the other.
Bench grinder to the rescue.


Care must be taken to keep the edge cool so that the steel doesnt "burn" and lose its temper.


The edge, ground square from corner to corner.  Grinding a new bevel comes next.  Most handplane blades like this one use a bevel of 30 degrees so thats what I will use.

Once the new bevel is ground, it needs honing to remove the coarse grinding marks and to begin to form the cutting edge.


This bevel is well formed but there is a dag of wired edge on the left corner that will hone off on the oilstones as a secondary bevel appears.
This will be honed at 35 degrees along the front edge of the bevel.

Ill use coarse, then fine oilstones, and then finally a hard white arkansas stone for polishing.
This is so similar to the chisel sharpening that I showed back in April 2012 that I will use an image from there:


Just think of this chisel as the Turner plane blade OK.
Sadly, I packaged the blade up and posted it off before getting a shot of the finished bevelled and sharpened edge - rats!

When it arrives  it will go back in Dylans number 5 Turner plane just like this one:

Happy shavings to all.
Best selling wood projects
Read More..

Best selling wood projects - Old Tools With Strange Trademarks

Best selling wood projects

Best selling wood projects


I was recently sent a request from a keen woodworker inquiring about the ancestry of a certain chisel.
It was an obscure trademark and unclear forging stamp that had him puzzling.
Here is the original correspondence:

Chisel Hallmark:
LION IS PRESENT ON EACH SIDE OF THIS TRADEMARK, LIKELY EUROPEAN

LOOKS LIKE

ACIBR FONDU

ANY IDEAS?
I had seen the logo before, as I have a plane blade manufactured by the same company, but the language was near indecipherable.
Here is the follow up picture:

 The logo should be familiar to any motoring enthusiast.
It is this one:
https://blogger.googleusercontent.com/img/b/R29vZ2xl/AVvXsEjUE1hfvM2kV4tmAiwZKkMmgpjUcG4CqhfBCDAkEEIPeGXJ-EnG6zwPL4WZ47crbIh4hCzbbOoR6zLoDO5Uepl-RnBFnXCN5EmPx4peQCALb0vtPKxO60iXm7SxYp4cbZHJwFKK2DvX3z4/s1600/peugeot09.jpg

 Yes, the same company that makes these beautiful cars has been in existence for over 200 years as a steel maker.  It has had steel foundries in France since 1810.

http://www.shearyadi.com/myworld/wp-content/uploads/2008/11/21112008_peugeot-logo-01.jpg

Here are its historical logos with dating.
The similarities are easy to see.

http://passionpeugeot.wifeo.com/images/visuel_droit_1889.jpg

As for the inscription on the chisel - 
Even though it is quite worn, it reads:

PEUGEOT FRÈRES 
ACIER FONDU 

Which in English reads:

Peugeot Brothers
Cast (literally - molten) Steel 

Now these steel products are not common across the Commonwealth of Australia, but are certainly the equivalent of some of the English and US tools of the same period.

My friend should be very happy with his find, as it will give many years of satisfying service - and as a bonus is a link to toolmaking history after the Industrial Revolution.

Happy shavings my friend


Best selling wood projects
Read More..