Best selling wood projects
I had the pleasure, over the last week, of travelling north to join my siblings in a wonderful family event that grew to include many cousins, aunts, nephews, nieces and extended clan members. Since nothing is more important than family, woodwork has taken a back seat for a while.
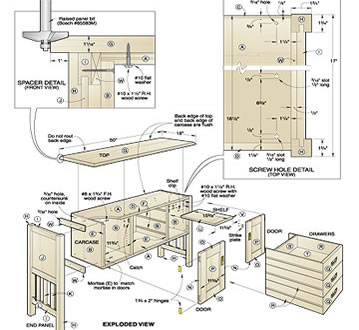
Getting back to the Jelly Cupboard has taken a bit of effort, as I have lost the rhythm that was developing as the parts began to take shape.
I am going to dovetail the joints in the carcass, and since this is a major step, and I had only a little time today, I decided to tackle a smaller part to help get the woodwork juices flowing again.
And so .... to the door.
I havent got the precise dimensions yet, so this work will concentrate on the stiles and rails. As a frame and panel construct, the frame needs to be brought to final thickness all round, and the groove cut for the panel.
Using a Wooden Plough Plane


The groove will be 5/16 inch wide, and as this is too wide for my little Record 043, I will turn to a wooden plough/plow plane made by Malloch of Perth.
The blades must be sharp, so this is the first task. Coarse/fine oilstone followed by hard white arkansas, gives a keen edge.

All parts of this plough plane, bar the depth stop, are held in place by wedges - this includes the blade and the fence arms. Because the wedges can be fragile, a small wooden mallet is used to adjust them.

Setting the blade on these old wooden ploughs, requires careful alignment of the leading edge of the back skate, with the groove that is cut into the back of the blade itself.
The rear skate has a leading edge that is bevelled from both sides to accommodate the groove.
If the blade is sharp, and the timber being grooved of straight grain, then the cutting depth can be aggressive. This will save time and cut down on labour.

Because each of the fence arms can move independently, the fence has to be checked at each end.
Of course the true distance will be from the fence to the outside cutting corner of the blade. Measure this first, then adjust the distance of the fence ends from the skates accordingly.

Before finishing, the depth of cut has to be decided and set. The built-in depth stop is wound down to the required distance from the cutting edge of the blade, and then locked in place with the locking screw on the side of the plane.

Once again, I start at the far end of the workpiece, and gradually plough my way over longer and longer strokes of the plane, until there is a continuous groove.
Start grooving more aggressively from the near end, to make the groove uniform all the way through - before finishing at the final depth.

The plane will stop cutting when the depth stop bottoms out on the workpiece.

If the completed groove shows any roughness or tearout in the sidewalls of the groove, then these can be cleaned up with a side rebate plane. Mine gets plenty of use.

Here is one of the rails and both of the stiles after finishing. Once again there is plenty of hamster litter as a by product of the ploughing process.
Ill leave this now until the carcass is assembled, before making up the panel and assembling the door.
Dovetails are next.
Bring it on!
....and happy woodworking to all.
Best selling wood projects

0 komentar:
Posting Komentar